
| Making A Window |
|
The Basics of Creating a Window Many people are very curious about exactly how a stained glass window is made. Aside from cutting the glass with a glass cutter most people have no idea as to what steps are involved in getting a window out to a customer. This page will show you the basics of a window's creation, from design to finish. This page should not be considered to be an instructional course in the art of stained glass creation, but rather a quick guide to the rudimental steps along the path to a finished window.
|
|
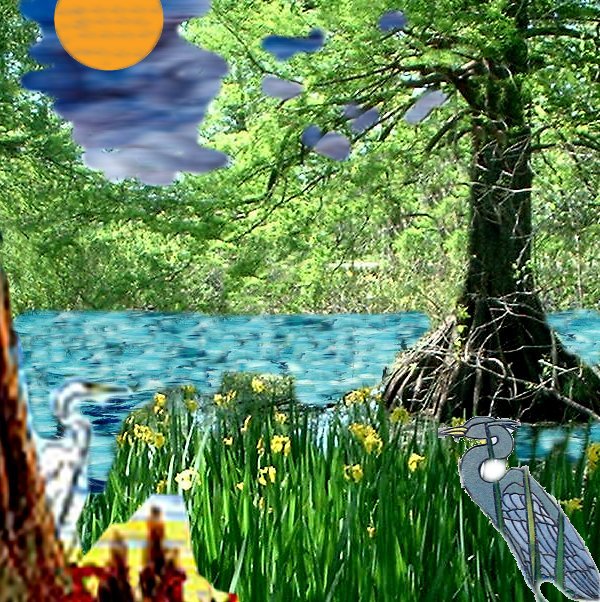
The Subject of The Window The first thing we need is a design. This is most likely the toughest part of the whole process. Choosing a design is never easy-- most customers know what they want in only the roughest sense. I start with the basics and expand from there. In this case a bayou scene was desired which would include a cypress tree with some cypress knees, some irises and a pair of herons. The hopes of finding a pattern pre-drawn with those elements are slim and none so I knew instantly I'd be drawing this one myself. When I design a window I break it down into many smaller elements and work on them one step at a time. Luckily I have a Bayou in my front yard complete with irises, so I went thru some pictures that I had taken the year before and turned up 2 that would serve our purpose. One had a great shot of the cypress tree in front of the house but it had no irises in it. Another picture had a closeup of the irises I needed so I put them both on the computer and cut and pasted together one picture with both elements. I found 2 different pictures of herons and then pasted them into the picture as well. I also blurred the sky and water (eliminating a lot of stray tree branches in the process). The following picture is what I ended up with. (Click any picture to enlarge)
|
|
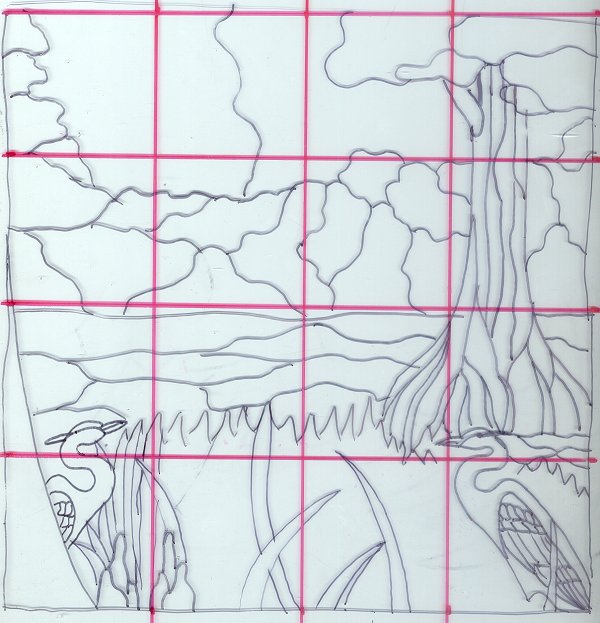
Getting It On Paper This rough idea was then shown to the customer and luckily he liked the layout. If he didn't I'd ask what he felt was off about the window and what he thought was correct. It's all a process of eliminating and replacing. Since we have a 'Go' on the design we need to draw it up full sized and add the details that will make it a finished pattern. My artistic skills are limited and I have many crutches that I use along the way to a finished drawing. In this case I printed what I have so far on paper and set a clear piece of glass on top of it to trace it out into a very rough line drawing. The details will be added when we draw it up full size. Once I had the basics traced onto the glass I needed to transfer it to the actual paper pattern that I would build the window on. The finished size of the window will be about 4 foot by 4 foot so I broke my line drawing down into 16 squares that, on their own, are easier to work with (the squares are traced in red):
|
|
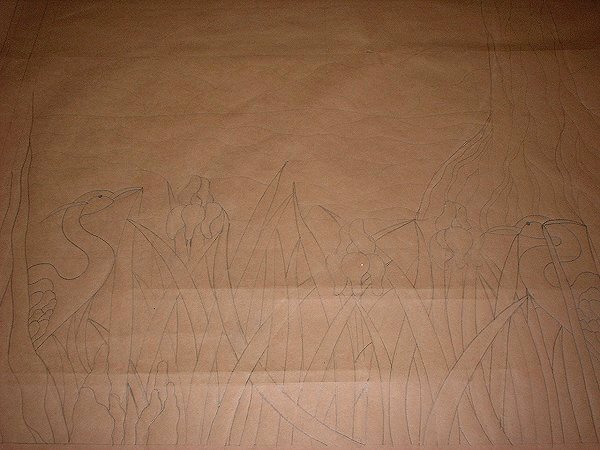
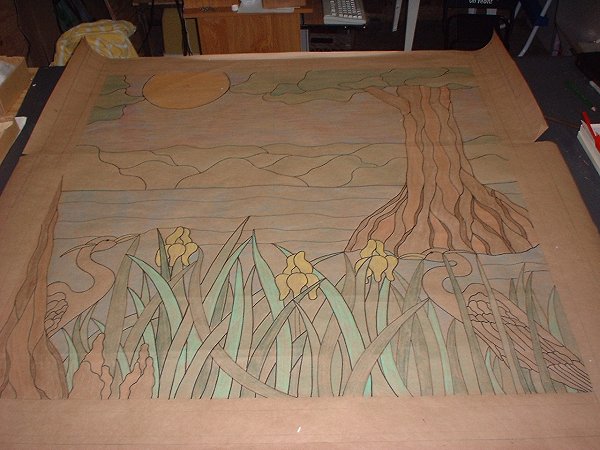
It's All In The Detail Next I drew a 4 foot by 4 foot square on paper and then broke that down into 16 squares also. Drawing the pattern a square at a time allows me to keep things aligned and in perspective. As I said earlier, I use a crutch every chance I can. Once I had the basic outline on the paper I began to add the details to it. It's much easier to do this on the full sized pattern rather than a small 8 inch by 8 inch drawing. The first thing I did was to fill in the 2 herons. Next I filled in the trees, followed by the leaves on the bottom of the drawing that make the 'field' of irises.
|
|
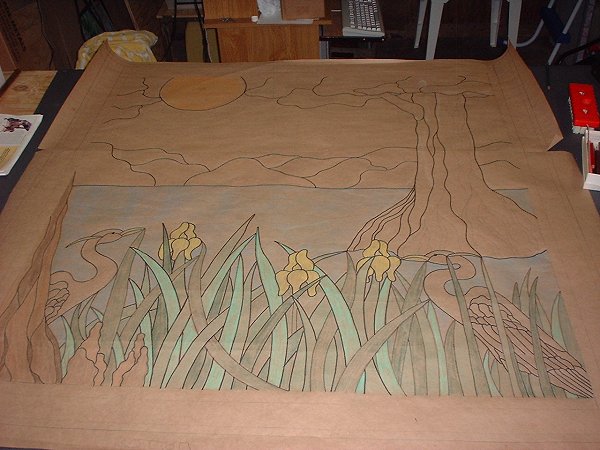
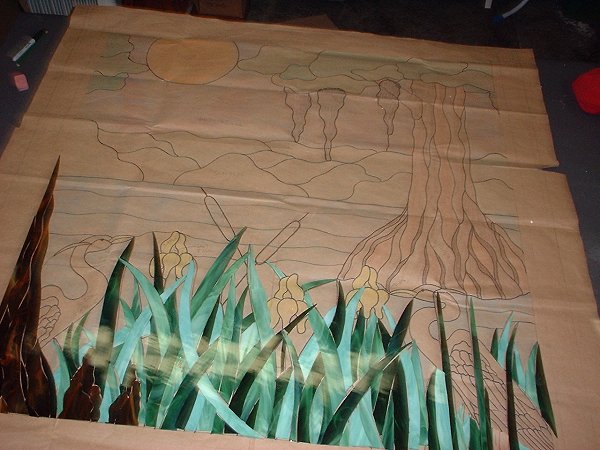
Coloring With the pattern pretty well fleshed out I could start coloring it to get a good feel for how it would look. I used 4 different greens for the leaves rather than just one. Since the leaves on the bottom of the window fill up a large part of the pattern you want to use a few similar colors as opposed to one lump of solid green. Alternating 4 different greens gives the pattern a more realistic look as well. Note that some of the leaves go in front of our heron. This makes the curved neck easier to cut and gives the window more depth. This is our pattern with most of the lines traced out in black marker and colored in with colored pencils.
|
|
Glass Pieces On The Pattern Next I color the tree and add some more detail. Again, rather than one brown for the tree truck I've colored it in three shades of brown. I've played with the skyline a bit and added detail to the water by adding some lines. The lines allow our leaves to cut into the water without having lead lines running off each leave up into the land. Glass can only be cut in certain ways and your patterns have to take these rules into account. Knowing how to hide lead lines is a key element to making realistic looking patterns.
Next we show our detailed pattern to the customer to see what he thinks. He loves it but wants to know if we could add some spanish moss and a cat-tail or two. We're able to make these minor adjustments easily. Now that we have a final pattern we're ready to start cutting the glass. To do this we need to make a second full sized copy of the pattern. We will use scissors to cut the copy up which gives us our pattern pieces. Those cutouts will be traced onto the glass. Numbering both patterns makes it much easier to reasemble your glass onto the pattern. Most times I just work a section at a time because numbers are hard to keep on the glass. As I cut each piece of glass I place it on the pattern which also gives me a feel for how the window is looking as I move along. If something looks out of the place, perhaps a color is wrong or there's a flaw in the glass, I will change it before continuing onto the next section.
|
|
Working Around Obstacles I cut the glass for the trees using only 2 shades of brown (I had colored it using 3 shades) but I make sure to use the light and dark sections of one piece of glass as if it were 2 different colors. By alternating the light and dark sections I get a subtle contrast effect without adding the price of another sheet of glass to the cost of the window. You can see this shading effect in the picture below. Remember that none of these pieces are ground yet so they don't fit together as perfectly as they will later on.
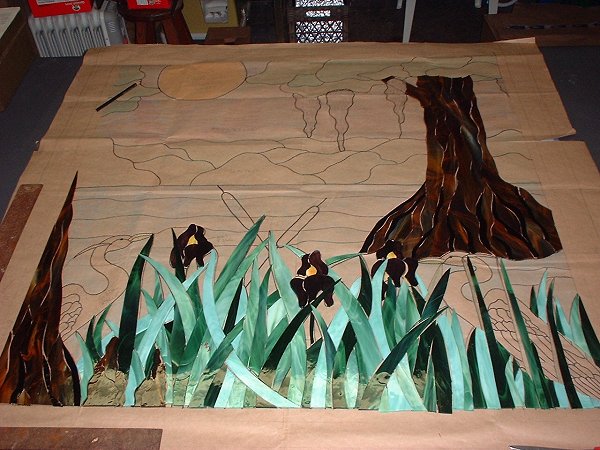
Rarely do things ever go smoothly during the making of a window. In this case we have no glass for the water because it was temporarily out of stock. Luckily there's plenty to work on while we're waiting for the blue-green water to arrive. As I said before, I tend to work in sections and I don't really like to bounce around on the pattern. In this case I had to skip the water and move on to a section that I do have the glass for. I also didn't cut the second heron because I wasn't confident about how it would look like against the glass we have chosen for the water. Rather than cut the bird and discover that it doesn't stand out with the water around it I decided to wait. My opinion is that the glass chosen for the water is a perfect shade and I will request that we change the color of the bird if it does not stand out well enough.

|
|
Wrapping Things Up All of the glass for this window was hand picked by me at the glass warehouse. Since the distributer didn't have any of the blue-green water color in stock we had them ordered it and then mail it to us when it arrived. Because I physically looked at each piece of glass I was purchasing I knew that I was safe with my colors and that nothing would clash or blend into each other. But the water was a gamble since we didn't get to chose the actual sheet that we would be using. Glass is never the same and when you have a mixed color you need to pay attention to what it looks like as compared to its sample. The blue-green we picked might come in mostly green or mostly blue rather than consisting of an even mix. It's a big plus to be able to look at glass in person rather than purchasing it unseen online or by mail-order. Luckily, when our sheet of blue-green comes in it's perfect. Now I can begin to fill in those empty spots I had to skip earlier. I cut it and then ground each piece of glass to fit perfectly. Once everything is cut we have to grind all the glass so it fits together perfectly. Grinding this window took just under 8 hours. It took another8 hours to wrap all of the glass in copper foil. The lead will not stick to the glass and that's why each piece needs to be trimmed in copper. The melted lead will bond to the copper (we call this step 'soldering'). Once the front is soldered we need to add the two rows of borders that finish off the glass cutting for this window. After the borders are soldered we flip the window over and solder the back side. Then I wash it clean, color the lead with a chemical (Copper Sulfate) and clean it a final time.
|
|
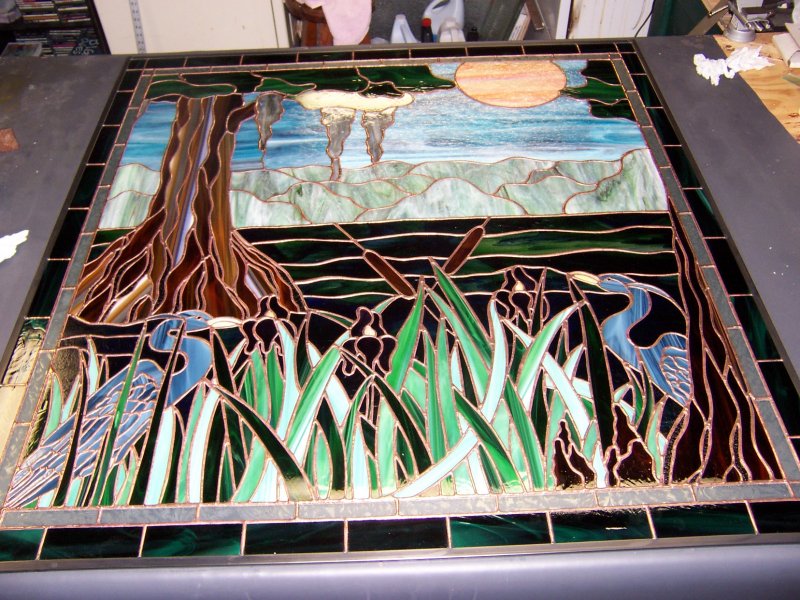
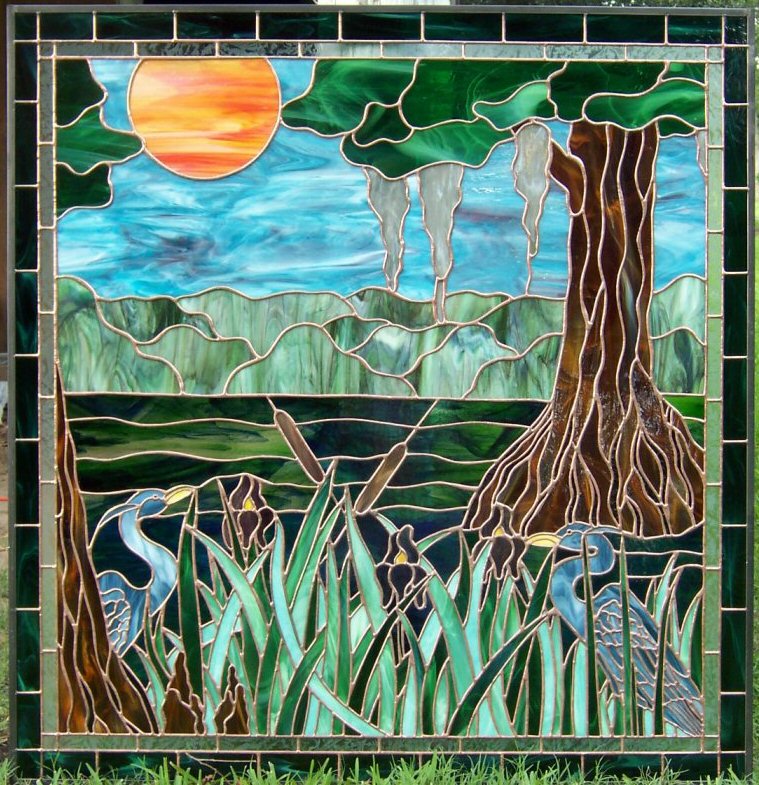
Completed But Unlit The finished window. Stainded glass is hard to photgraph-- you need light behind it to get the full effect but that's not easy to do while it's being lit from the front also. This is a picture of the finished window as viewed outside in sunlight. As you will see the look will be very different when it's installed and has more light behind it then in front of it.
|
|
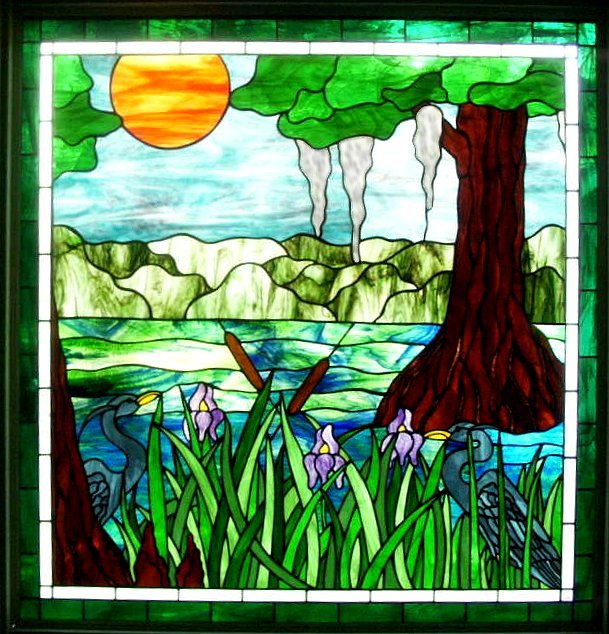
Light Behind the Window And finally, the window as seen installed with light behind it. You can see that it takes on a whole new look when it is illuminated from behind rather than the front. A window like this is best viewed from inside the house during the day and from outside (with the room light on) during the night.
|
|
A Final Word I hope this has helped you understand what is involved in making a window from start to finish. It's a very laborous process that surprises people when they first start working in glass. But as I always say, Stained Glass is as rewarding as it is time consuming.
|